Wednesday, 6 October 2010

Tuesday, 12 January 2010

Competition

I entered a macro shot competition. The voting is now closed but i don't know how well i did. Below is a image of the photo I entered and below that are comments.


Below is the website I entered my macro shot.

Monday, 11 January 2010

Digital Darkroom (2): Writing a Caption

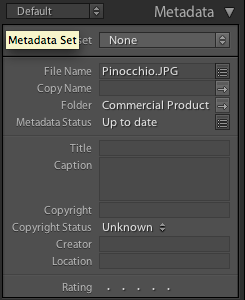
Writing a caption

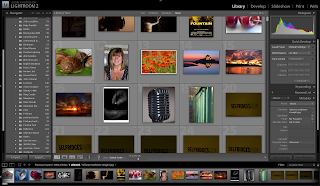
As you can see in the screen shot to the left, I have wrote a caption. This is so I can make notes while looking through your images.

Digital Darkroom (1): Importing and Organising

Importing Files/Folders

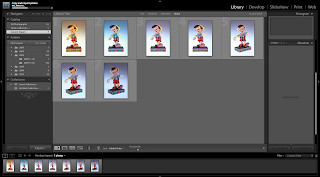
As you can see in the screen capture to the left, i have imported some images. It shows you how it is importing.


Naming Files/Folders

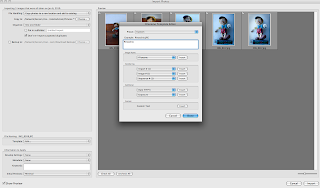
As seen in this screen shot to the left you can see that I am about to import my files but I have changed the file name so instead of the files being called JPEG's I've renamed them to Pinocchio.


Organising Files/Folders

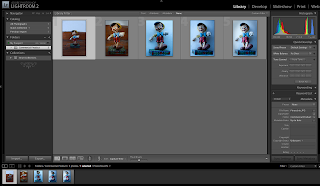
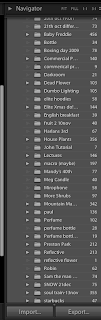
As you can see in the screen shot to the left my files are in alphabetical order. The are organised making it easier for me when editing to find the folder i need quicker and easier.


This is a closer few of my organised files and folders.

Sunday, 10 January 2010

Street Light


I chose to take an image of a car underneath a street light because the protection over the lights of the car is see through so it showed off the colour of the street light better.


I took two shots of the car with the street light but changed the setting on my camera to tungsten and flurscent. The tungsten setting was used in the image to the left. The light looks white and shows the individual colours off.


This means that the tungsten setting and the street light both light at the same degree kelvins which is about 3200 so they make the light neutral.


This shot was taking using the flurscent setting on my camera, as you can see the car and the background has a orange tint to it.

Thursday, 7 January 2010

Blog Sites

I have done some research on some other blogs, to find inspiration and ideas for my blog.
I had a look at this link below and I liked how the top bar has an image in it and straight away it made me wont to continue reading.
http://iron-mitten.blogspot.com/
A screen shot of the image:-


Wednesday, 6 January 2010

Commercial Product

For our commercial products I have a few ideas which i am going to test out and choose the best. This product is one of my ideas "Pinocchio" which is one of the Disney Traditional Collectibles. The two images below is the character that I'm photographing but what i have done below i am not happy with.


I like the way the character looks, but i tried to get a different background then just white but the wood behind looks dirty and it cuts of to white so the wood isn't continuous so Ive decided this is one of my practise shots.


Again with this image i tried to use a white background but at the time I didn't have one so i led the figurine on a white pillow not realising that's it doesn't look correct as it looks like he is floating in mid air.


I feel that even though what Ive done I'm not to use towards my final product I feel that I've learnt that you have to be aware of everything you photography and how it will look within the shot.

I attempted to take another picture of Pinocchio. I used the studio and used a white background and studio lighting. This Image is much better than the others above. It has a slight blue edge around the figurine but because it is at the centre of body your eyes go towards it and the colour blue goes well with the blues on Pinocchio. I posioned to him so he is facing the screen, this is so it shows more of him off.

Tuesday, 5 January 2010

Magic Hour: Sun Setting

I went to the top of Darwen Tower at the beginning of October to get a image of "Magic Hour". Magic hour is the first or last day of sunlight as it rises or sets, it creates an atmosphere on the horizon and gives out different colours of light.

Some examples of Magic hours from other photographers are below.


These images below are some that I've taken.


I feel that I've captured what Magic Hour does to the horizon but I could of done better. For example I've taken all my images looking into the sun. Whereas I should of taken a picture of something using the lighting from magic hour.


I was high up. So I was able to see the sun setting til the very end. This image shows you the different colour of light what the sun setting makes.


If I was do to it again I would capture something in the image to get the atmosphere rather than the actual sun setting.


Since these images I have tried since then to do more sunset pictures but they haven't been successful but I feel since taking these images I have learnt more. The more I go out and capture I feel i am improving.

Tuesday, 15 December 2009

Lighting Technique: Incandescent, Flourescent and Halogen/tungsten

Incandescent

For incandescent light I have used a basis normal household bulb. The light is my bedroom light and is slightly dim so the figurine is slightly dark. The light was above the so the figurine has large shadows underneath area for example underneath its chin and ears. The household bulb and the tungsten setting on my camera is about 3200 degrees kelvin. Therefore the both neutralise each other showing is normal colour of the figurine. The fluorescent setting on my camera is about 4000 degrees kelvin so it gives a brighter feel and orange glow to Dumbo (the figurine)

Tungsten setting on my camera


Fluorescent setting on my camera


Fluorescent Lighting
Fluorescent lighting is mainly white and when using tungsten setting on my camera it make Dumbo look very look and cold and doesn't really show off the colours on the figurine. When using the fluorescent lighting with the fluorescent setting on my camera, Dumbo looks more grey but you can see the different colour on the subject more clearer.

Fluorescent with tungsten setting on my camera.


Fluorescent with fluorescent setting on my camera.


Side Lamp (Halogen/tungsten)
I used a lamp that you would use as a desk top lamp. I've noticed when doing this practical that when setting my camera to tungsten i thought it would be the same as using the house hold bulb but it doesn't. It has an orange tint to the image. With the fluorescent setting i thought it would look blue similar to the house bulb but instead its done the same as the fluorescent light with a tungsten setting. It looks very blue and cold.

Side lamp with tungsten setting on my camera


Side lamp fluorescent setting on my camera


Thursday, 10 December 2009

Drop focus

Drop focus is more commonly know as selective focus. It can be achieved by dropping the front of the panel of the lens. For my drop focus I have used a lensbaby composer. As shown below.


This is an example of what a drop focus image is


My version of drop focus using my lensbaby composer.


My aim was to everything out of focus apart from the top left courner and i managed it. i kept my camera where it was and dropped the lens down to get the area I want in focus and the rest out of focus.

Highly Reflective

For the reflective object, the aim was to take am image of something that is reflective to practise the use of lighting it whereas i thought we had to take an image of something that reflects an object. Below are some examples


Rotated so you can get the effect of the tree.

I like how the puddle of water forms around the tree and you see the detail off the tree like the thin stems co
ming of each branch. I have slightly under exposed it so you can more detail in the tree


I decided to use this reflective ball from a wind spinner (catches the wind and spins and it looks like the ball is moving up) It reflected objects into the ball.

I like using this reflective ball because it shows all the detail in object its reflecting.


I decided to capture the building because i like how youcan see the detail in the building e.g. the curtains inside the window etc... Also how you can see the clouds clearly in the sky.


The main aim for this section is to capture something that is reflective. Therefore I captured a microphone with a strip of light down the edge. I finally got the aim of what was needed to be done but the way i captured the image could of been better. There is a line in the horizon which distracts you from the microphone and the way the microphone is in the frame could of been more interesting e.g. a close up.


I retook the microphone this time i got closer to the subject to make it more interesting so you can see all the detail within the microphone.


Slightly blurred but the angle is better because the lighting stand outs more and you can see more detail.

Tuesday, 8 December 2009

Close Up

A close up shot fills the frame with what you photographing and makes it look bigger than it seems.

Below are some examples that I have done of close ups.


Digital Darkroom 3: White Balance

Using the white balance/temperature slider in Lightroom I made an image look different in colour.

Original

Bright and has a warm feel to the image

Cool, blue and has a eerie cold effect to the same image, just by moving the temperature you can get a different effect to the same image.

Grey

Monday, 7 December 2009

Camera/Lens Technique Telephoto and wide lens shot

I used a 18-55 mm lens. The lens is a much smaller zoom than I would of liked to of used but I was out in the park the other day and I saw this helicopter flying above me so I stood in the same position and zoomed in to my maximum and took the image then zoomed out as much as could so you can see the difference from telephoto and wide.


Telephoto you can get closer so you can see more detail

Definition of telephoto is when your camera is extended to the maximum to get a narrow closer shot.

(Researched:-http://www.mobileburn.com/definition.jsp?term=telephoto


Wide (helicopter) It looks like a spec in the clouds whereas on telephoto you can see more detail.

Definition of wide angle shot:- Camera lens to the minimum length to get a fuller view of the image.

Research:-
http://www.merriam-webster.com/dictionary/wide-angle


I have taken a profile picture of a person, one we're my lens is zoomed out the maximum (telephoto) and some we're i have zoomed in the minimum making it wide angle.


Telephoto shot

I put my lens to the maximum zoom and took a portrait picture of someone

As you can see in the image it looks like any normal profile image. There's plenty of head room and she doesn't look to close to the lens.


Wide angle shot

I put my lens to the minimum zoom and got closer to the person so it was still a portrait picture.

As you can in this image the face looks to be more round and wider and much closer towards the lens. This is because i had to get closer to the person to get a profile image.

Camera/Lens Technique Slow Shutter Speed

The slower the shutter speed the more light can pass through to the sensor. Therefore if a subject moves you are more likely to get an image that's is blurry.

My image of someone playing the drums. The shutter speed is low so the lens is open for longer therefore his hands are blurred.

In photography and digital photography the shutter speed is the unit of measurement which determines how long shutter remains open as the picture is taken. The slower the shutter speed, the longer the exposure time.

http://www.webopedia.com/TERM/s/shutter_speed.html