Wednesday, 2 December 2009

Camera/Lens Technique: Depth of Field

I used the microphone as the focus point and the model in the distant is out of focus.


Unfortunately the model in the background looks much darker than it did on my computer therefore its not as effective.

Depth of field is the amount of distance netween the nearest and farthest object that appear in sharp focus in the photograph.

(Definition taking from website below)


Below is an example of depth of field. The way the flowers in front are in focus and the further away from the camera the more out of focus they become


Camera/Lens Technique High Shutter Speed

This image was used in a task but at the same time it shows the use of a high shutter speed and captures the water falling without any shakes or distortion from the water.


Treasure

For our fortnight image, the word was treasure.

My first idea was to use my ring that my boyfriend gave me but my sister recently had a gorgeous baby boy "Freddie" 10 weeks early and he is in hospital recovering. I went to take a few pictures for her and when I was looking through what images I had capture, I came across the image below. I looked at it and it made me think how precious "Freddie" is to me and the family. Therefore I decided to use this image as my treasure image.


At the time I didn't have a tripod so Freddie's hands are slightly blurry but I feel that the image relates to the word treasure


Wednesday, 25 November 2009

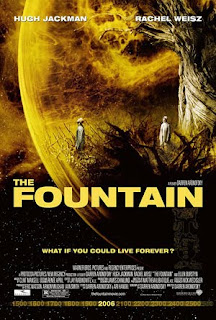
The Fountain

We had a group task to work in a group of no more than three people and produce one final photography influenced by one of the following film titles:
  • Breakfast at Tiffany's
  • The Fountain
  • Into the Wild
  • Dead Man's Shoes
  • Dog Day Afternoon
  • A Clockwork Orange
  • Sunset Boulevard
  • Three Colours Red
  • Stand by Me
  • The Thin Red Line
  • Rear Window
We started at 10am and our deadline was no later than 2pm.

As a group we decided to do "The Fountain" because out of all the ideas we had for each film we decided this would be the easiest and most effective.


For example we had an idea for "Rear Window" to capture an image through a window but we couldn't think of an effect subject that we could capture through the window.


The reason why we decided to choose the giving of a ring is because in the film the Queen of Spain gives a ring to a Conquistador which symbolises his pledge to finding the elixir of mortality. The water through the ring is to symbolize the fountain.

I personally feel that the image was a good idea but there are a few things I would like to change in the image for example, you can see the reflection of light on the water on the side of the hand at the bottom and it draws your attention away from the ring. Also even though it is two different tones of hands I would of preferred the hands to look the same tone of darkness.


Below is a link to see the trailer for "The Fountain"


Tuesday, 24 November 2009

Dark Room Session 5

We have not done this session yet but it involves us burning some of our images. This consists of us cover session of our images so that the image is consistant with exposure and tones...

Dark Room Session 4

Today's session we are going to enlarge our negatives on to photographic glossy paper and develop black and white prints.

Chemistry is the same as contact prints, temperature at 20 degrees, develop for one minute, stop for one minute and fix for five minutes.
The enlarger shines light though the negative and onto the photographic paper, you can change the amount of light which makes the negative either dark or brighter and you can also focus the image. Same again as the contact sheet, Immolation side down of the negative and Immolation side up on the paper (Immolation to immolation) Before you get your photographic paper out and print, you first set it up by turning the light on continuously and focus your image (use scope to check the grains so its in focus) then you turn it off and place your paper in the same spot to print your image.
The enlarger has leavers at the side to stop light leaking out and going on the base board. It has grades as well, the higher the number the more contrast it is, the lower the number the less contrast the print is.
Below is my test strip and prints.


This is one of the prints from the negatives. This print has an exposure of 12 seconds.


This is my test strip. You can see slightly where the lines are of different exposure.

Dark Room Session 3

A few days before darkroom session 3 we developed our film.


In today's session we produced contact sheets (negatives touching the paper). We used a contact base board and placed our negatives into the plastic side with the immolation side down facing the immolation side of the photographic paper (10x8 Ilford glossy paper). The photographic paper is orthocramtic which means it was safe to use it in red light and the paper wont be ruined.


We used the enlarger to print our negatives onto the paper. We did a test strip first to test which exposure was better. I did an exposure of 5 seconds at F8 grade two and a half on the whole test strip. I then covered a quarter of it and exposed it for another 5 seconds, then half of it for a further 10 seconds then three quarters of it for 20 seconds. So I've doubled up each time I've exposed the test strip (5, 10, 20 and 40 seconds)

Below are my negatives and test strips and prints etc...


These are my negatives.


These are the contact prints.